


Learn More
Food, Water, and Gear
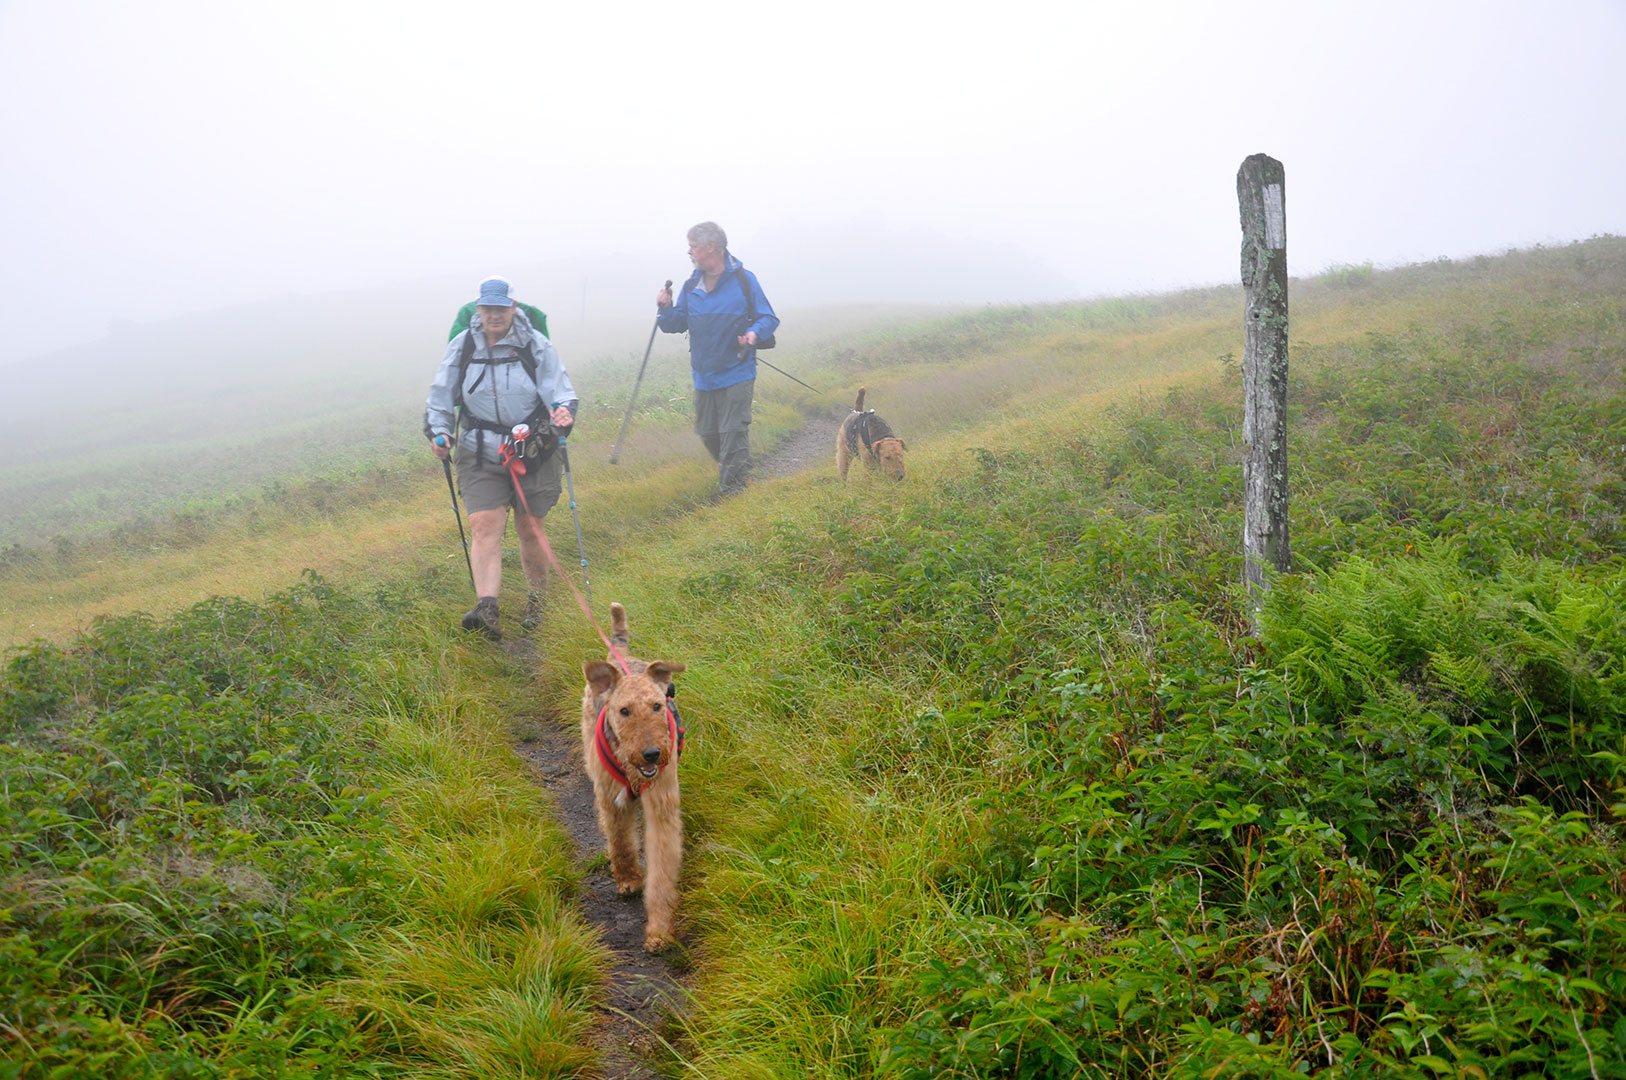
Thoughtful planning of your food, water, and gear is key for an enjoyable and successful time on the Appalachian Trail.
Hiking-Friendly Foods
If you’re out for the day or the weekend, you can probably pack whatever foods you like best, including fresh fruit or a deli sandwich with the works. But since these spoil quickly or are heavy due to their high water content, they’re not good for extended backpacking trips.

Breakfast
Instant oatmeal or grits, powdered milk and breakfast cereals that won’t crush easily, and toaster pastries are quick favorites.

Lunch
Crackers and cheese, tuna and chicken in foil packets, tortillas, pita bread or bagels, and peanut butter, nut butters and other spreadable items are popular lunch options.

Dinner
Dried foods like pasta that can be boiled and prepared on portable stoves are popular with hikers. Tuna or chicken in foil packets can add protein, or textured vegetable protein (tvp) can be used. Some instant foods require only that you boil water.

Snacks
Carry lots of snacks, including things you can stow in your pockets and nibble while you’re hiking. You’ll have more energy if you snack often compared to if you eat only big meals. Energy bars or a mix of dried fruit, nuts, and chocolate bits work well.

Campfires
Building campfires to cook is not the best strategy. Backpacking stoves are more convenient and reliable in wet weather, and minimizes your impact on the environment around you. In some areas, campfires are prohibited.

Pack In/Pack Out
Be sure to pack out all your garbage, including items such as apple cores and orange peels. Don’t burn garbage in a campfire; it rarely burns completely and may produce harmful fumes.
How much should you carry?
Backpacking burns a lot of energy. However, novice backpackers on the A.T. often make the mistake of carrying too much food. An overly heavy pack with excess food can take the fun out of backpacking. When deciding how much food to carry for your trip, keep these tips in mind.
- Avoid canned foods or foods high in water weight.
- 1.5 to 2 pounds per day to start can be adequate in most circumstances if your food is high in calories, but if you are doing big miles or rugged terrain with a lot of elevation gain you will probably need more. On a long-distance hike you will develop a bigger appetite and may also need to carry more.
- In cold weather, when you need more calories to stay warm. Carry 2.5 pounds per day.
- In winter or early spring, carry enough food for an extra day or two in case you are stranded by a snowstorm.
- Many lightweight backpacking staples can be purchased at a grocery store. You need not rely on expensive, prepared “backpacking food” sold at camping stores, although these products can offer convenience and variety.
- Dehydrating your own food can provide you with nutritious and lightweight meals and snacks, but is labor and time-intensive.

Resupply on the Trail
For longer trips, you can either buy food along the way or mail it to yourself using a “drop box” or a “bounce box.” Explore these options in the food resupply section of the thru-hiker portion of our website.
Gear Needed for the Trail
If you’re backpacking and plan to camp out, we suggest you consult a good “how-to” book for details about what to carry, or that you talk to an experienced hiker.
Don’t forget that some items can be shared with a partner to lighten the load!
Day Hike: 10 Gear Essentials
Navigation: In addition to planning ahead so that you know the terrain you expect to cover and how the Trail is marked, you will want to pack a map and a compass and have the knowledge to know how to use them. If you bring a GPS, bring extra batteries, and know how to use it. Bringing a guidebook can also help orient you along the way by describing landmarks, etc.
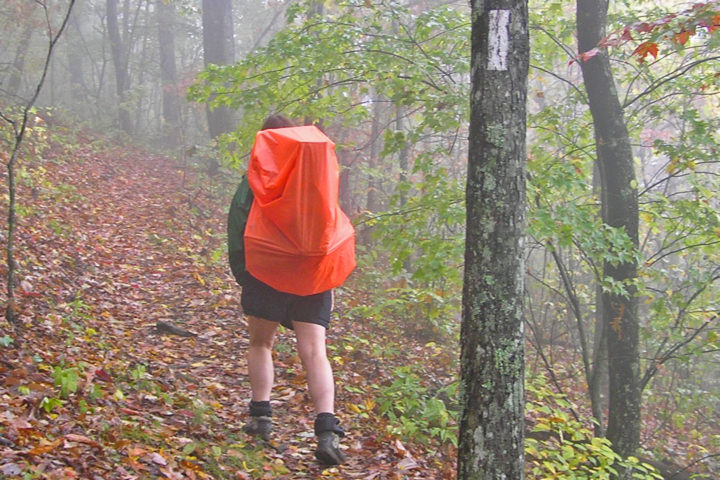
Insulation: Year-round, carry a long-sleeved shirt, wool/fleece-lined hat, a rain jacket or poncho. These ensure you can regulate your temperature when the rain sets in or the wind picks up. Layers like a fleece sweater or jacket, long pants, and gloves are essentials to your backpack when you’re hiking anytime beyond the height of summer.
Hydration: Whether you use water bottles or a tube hydration system, have the capacity to carry at least 2 quarts. A water purification system like iodine, bleach, Aqua Mira, filters, or UV light are recommended since they neutralize/eliminate viruses, bacteria, and other naturally occurring entities that could be harmful to hikers.
Nutrition: Pack enough snacks to fuel your body for the exertion of your hike. Pack one extra snack for use in the event of an emergency that keeps you on Trail longer than expected. Make sure to carry a plastic bag to pack out anything you don’t consume, like apple cores, excess food, or food packaging.
Illumination: Carry a headlamp and extra batteries in case you stay out longer than intended.
Items for the Elements: Sunglasses, sunscreen, insect repellent, and a sun hat are all essentials for a safe and enjoyable trip. Insect repellent will save your sanity on Trail, and the protection from the sun will preserve the youthfulness you gain from your time spent outdoors. Be particularly aware that pre-treating clothes and gear with permethrin is another wise defense against ticks.
Bathroom stuff sack: In your stuff sack pack: tissues, trowel, hand sanitizer*, and a resealable plastic bag. If you pee and use toilet paper (TP), pack it out in a resealable plastic bag. If you poop, dig a hole 6’’ – 8’’ with your trowel 70 steps from the Trail and 70 steps from water sources, and then put the dirt you took out of the hole back on top using a stick. Step on it to make sure it’s all in there tight so wildlife won’t discover it.
Personal first aid kit: Things you might carry include: adhesive bandages (e.g. Band-Aids), moleskin, gauze, elastic bandage (e.g. Ace bandage), sports tape, anti-diarrheal, antihistamine, anti-inflammatory, antibiotic cream, tweezers, etc.
Small emergency kit: In packing for the unexpected it can be easy to bring too much, but being prepared for the unforeseen is also part of the responsibility of heading into the outdoors. Things you should consider carrying in your emergency kit include duct tape, cordage, knife, sewing kit, repair kits for your camp stove and mattress, extra batteries for your headlamp/flashlight, whistle, an extra lighter or waterproof matches, permanent marker, and back up water treatment tablets.
Appropriate Footwear: Shoes that are broken in and comfortable can prevent hot spots, blisters, and greater foot injuries.
Beyond the Ten Essentials:
-
- Pack cover or a contractor garbage bag as a pack liner
- Trash bag
- Watch
- Trekking Poles
- Backup water treatment
- Knowledge of:
- Location regulations (call the local ranger station for whatever land you’re on)
- Weather forecast
- Terrain and distance of your chosen hike
Backpacking and Overnight Hikes: 10 Gear Essentials

Navigation: Planning ahead so that you know the terrain you expect to cover and how the trail is marked is an important first step for hiking. You will want to bring a map or guidebook and compass and know how to use them so you can navigate in the field. If you bring a GPS, bring extra batteries, and know how to use it. Bringing a guidebook can also help orient you along the way by describing landmarks, etc.
- ATC Databook: The most basic and compact of all the guidebooks. A consolidation of the basic information from all 11 A.T. guidebooks into a lightweight table of distances between major A.T. shelters and road crossings, and features the annual official source of the length of the A.T.
- ALDHA’s Thru-Hikers’ Companion: Basic information for a 5-6 month thru-hike, includes elevation profiles, distances between major Appalachian Trail shelters and road crossings, and provides maps of towns and communities near the A.T.
- The A.T. Guide (AWOL): The most popular Trail guide for thru-hikers on the A.T. Includes: landmarks, mileages, and elevation profiles. Maps of 88 towns. Coordinates over 200 trailhead parking areas with GPS coordinates. Symbols for quick identification of services.
- A.T. Guide Apps: Premier hiking trail guides for smartphones. Thousands of points of interest, ranging from water sources and campsites to views and places to visit. Virtual Trail registers and interactive elevation profiles that locate the hiker on the profile thanks to GPS. Instantly updating trail information and points of interest. Also provides maps of towns and communities near the A.T.
Insulation: Year-round, carry a long-sleeved shirt, wool/fleece-lined hat, a rain jacket or poncho, and a sleeping bag. These ensure you can regulate your temperature when rain or windy weather sets in. Layers like a fleece sweater or jacket, long pants, and gloves are essentials to your backpack when you’re hiking anytime beyond the height of summer. Carrying a sleeping pad will insulate you from the ground and generally improve a night’s sleep outdoors.
Hydration: Whether you use water bottles or a tube hydration system, have the capacity to carry at least 2 quarts. Water purification systems like iodine, bleach, Aqua Mira, filters, or UV light are recommended since they neutralize viruses, bacteria, and other naturally occurring entities that could be harmful to hikers.
Nutrition: Pack enough meals and snacks to fuel your body for the exertion of your hike between town resupply points. Pack one extra meal for use in the event of an emergency that keeps you on Trail longer than expected. In your “kitchen” be sure to include your camp stove, fuel, pot, utensil, matches or a lighter, and a plastic bag to pack out anything you don’t consume, like apple cores, excess food, or food packaging. The ATC recommends that a bear canister as the most effective method of protecting your food from bears and other critters and keeping yourself and bears safe from the consequences of bears becoming habituated to human food. Please use cable systems or bear boxes wherever they’re provided for food and “smellables.” If you’d like to try a bear canister for free, ATC, local A.T. management partners, and BearVault have begun loaner programs in Georgia and Vermont.
Shelter: While three-sided shelters or lean-tos are located at varying intervals along the A.T. and offer a great overnight place to stop, use of them is on a first-come, first-served basis, thus not guaranteed. Backpackers on the A.T. should always carry a tent, tarp, bivy, or hammock.
Illumination: Carry a headlamp and extra batteries.
Items for the Elements: Sunglasses, sunscreen, insect repellent, and a sun hat are all essentials for a safe and enjoyable trip. Insect repellent will save your sanity on Trail, and the protection from the sun will preserve the youthfulness you gain from the time spent outdoors. Be particularly aware that pre-treating clothes and gear with permethrin is another wise defense against ticks.
Bathroom stuff sack: In your stuff sack pack: tissues, trowel, hand sanitizer*, and a resealable plastic bag. If you pee and use toilet paper (TP), pack it out in a resealable plastic bag. If you poop, dig a hole 6’’ – 8’’ with your trowel 70 paces (200 feet) from the Trail and 70 paces from water sources, and then put the dirt you took out of the hole back on top using a stick. Step on it to make sure it’s all in there tight so wildlife won’t discover it.
Personal first aid kit: Things you might carry include: adhesive bandages (e.g. Band-Aids), moleskin, gauze, elastic bandage (e.g. Ace bandage), sports tape, anti-diarrheal, antihistamine, anti-inflammatory, antibiotic cream, tweezers, etc.
Small emergency kit: In packing for the unexpected it can be easy to bring too much, but being prepared for the unforeseen is also part of the responsibility of heading into the outdoors. Things you should consider carrying in your emergency kit include duct tape, cordage, knife, whistle, repair kits for your camp stove and mattress, and needle and thread.
Beyond the Ten Essentials:
- Pack cover or a contractor garbage bag as a pack liner
- Footprint (if using a tent)
- Watch
- Trekking Poles
- Backup water treatment
- Knowledge of:
- Location regulations (call the local ranger station for whatever land you’re on)
- Weather forecast
- Terrain and distance of your chosen hike
*Note that most hand sanitizers have been proven ineffective against norovirus. The ATC recommends the use of biodegradable soap and water to ensure the effective killing of the virus.

Hope for the best weather, but pack for the worst
Clothing to protect you from cold and rain is a must, even in midsummer and especially at higher elevations. Synthetic fabrics such as polypropylene and various acrylic blends as well as wool or silk help protect you against the dangers of hypothermia.

Avoid Cotton Clothes
This is particularly true in chilly, rainy weather, which can strike the mountains at any time of year. Wet cotton can be worse than nothing and can contribute to hypothermia, a potentially fatal threat.

Layer Your Clothes
Since hiking will make you sweat, no matter the weather, shedding layers enables you to regulate your body temperature more effectively than choosing between keeping a heavy jacket on or taking it off. Various synthetic materials can provide a base layer and a mid-layer and/or insulating outer layer; wool or silk are other options for a base layer and down is the warmest option for an outer layer but must be kept dry. A lightweight raincoat with a hood is essential. A hiking umbrella can also help keep you dry and make hiking in the rain more pleasant.

Footwear
The most important thing is that shoes fit well and are broken-in. Nothing spoils the fun or ends a hike quicker than blistered feet. On a day hike, broken-in tennis shoes can be a better choice than brand-new boots. When carrying a backpack or hiking on rocky terrain, more substantial hiking shoes or boots may be desirable, but some hikers walk the entire A.T. in running shoes or cross-trainers. Remember, the heavier your pack, the more substantial a shoe you will need. Shop for boots in the afternoon as feet swell throughout the day. Thru-hikers can expect their feet to expand over the course of their hike, so if between sizes, choose the larger size.
Finding Water on the Trail
Water faucets, pumps, or spigots are rare. Reliable, natural water sources are listed in guidebooks, and springs and streams are marked on most official A.T. maps. Most, but not all, shelters are near a reliable water source. Some springs and streams dry up during late summer and early fall, so plan carefully.
Water Safety and Treatment
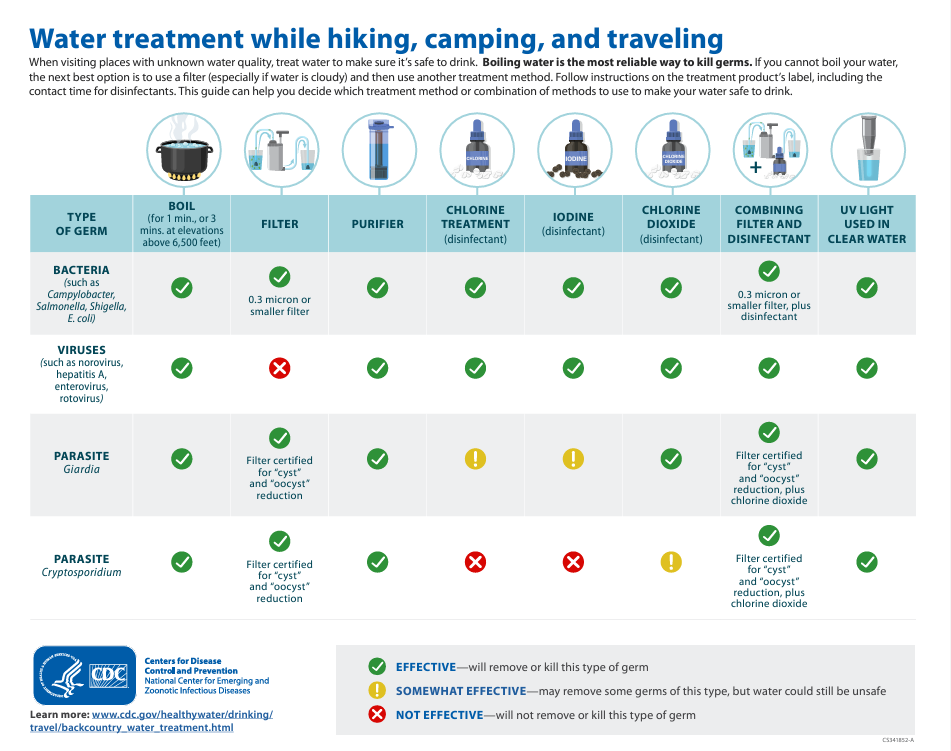
CDC water treatment poster. Click for a larger, printer-friendly version.
Water in the backcountry and in water sources along the Trail may be clear, cold and free-running, and may look, smell and taste good. Yet even so, these sources can still be contaminated by microorganisms, including Giardia lamblia and others that can cause diarrhea or stomach problems. Visit the Centers for Disease Control and Prevention page on healthy water for detailed information on water treatment methods and their effectiveness in removing pathogens, as well as information on less common treatment methods that are not listed below.

Boiling Water
THE GOOD: The most certain treatment to destroy Giardia and Cryptosporidium is to bring water to a rolling boil for at least one minute. If you are above 6,562 feet, boil water for at least three minutes. Boiling will also destroy other organisms causing waterborne diseases.
THE BAD: This method is time-consuming, requires additional fuel, and may affect the taste of water.

Portable Water Filters
THE GOOD: Filtration can be used as a pathogen reduction method against most microorganisms, depending on the pore size of the filter, amount of the contaminant, particle size of the contaminant, and charge of the contaminant particle. Use a filter that has been tested and rated by National Safety Foundation (NSF) Standard 53 or NSF Standard 58 for cyst and oocyst reduction (absolute pore size of 1 micron or smaller)
THE BAD: Only filters that contain a chemical disinfectant matrix will be effective against some viruses.
Iodine, Chlorine, or Chlorine Dioxide
THE GOOD: Disinfectant tablets or drops can be used as a pathogen reduction method against microorganisms.
THE BAD: Contact time, disinfectant concentration, water temperature, water cloudiness, PH, and other factors can impact the effectiveness of chemical disinfectants. The length of time and concentration of disinfectant varies by manufacturer and the effectiveness of pathogen reduction depends on the product. These chemicals are either completely ineffective or at best, moderately effective at killing the protozoa Cryptosporidium.
Combined Water Treatment
THE GOOD: If boiling water is not desired or possible, a combination of filtration and chemical disinfection is the most effective pathogen reduction method in drinking water for backcountry use. For short trips, take a supply of water from home or from other treated domestic sources.
Discover More
Plan and Prepare
Hiker Resource Library
A collection of resources for hikers to stay safe, healthy, and responsible on the Appalachian Trail.
Plan and Prepare
Safety
Learn about the hazards you may face when hiking the Appalachian Trail and how to avoid or prepare for them is the best way to stay safe.
BY CAITLIN MILLER
11 Easy Ways to Improve Your Leave No Trace Footprint
A collection of simple and seemingly small ways you can practice Leave No Trace and help protect the A.T. experience.